How to Implement CAPTCHA or Recaptcha on MS Power Pages – Part 2
This is the Part 2 of the original post How to Implement CAPTCHA or Recaptcha on MS Power Pages.
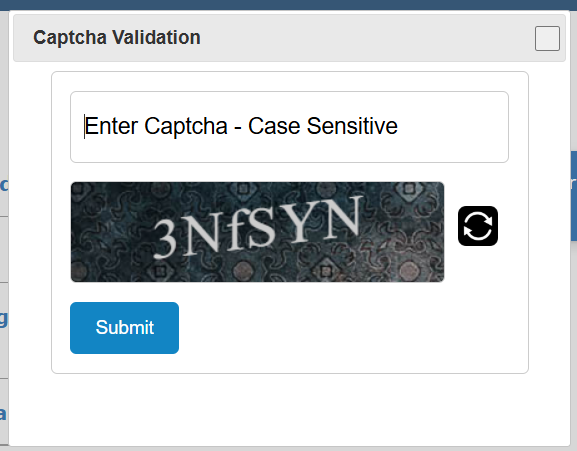
In the original post I was discussing on how to implement Google Recaptcha in Power Pages. For this article, I would be using a different CAPTCHA control JQCap. The control looks like below:
This is just an alternative should you or your client not wish to use Google Recaptcha. In order to implement the control, I took a very similar approach as the Recaptcha. Below is the summary of the steps:
- Upload custom CSS for the CAPTCHA UI.
- Use Marius Wodtke’s PowerPagesActions solution.
- Create 2 plugins. One that is used to generate the CAPTCHA code for the UI control, another one to perform the server-side validation.
- Create 2 Custom APIs to call the plugins.
- Add Table Permission and Site Settings.
- Register your Custom API with PowerPagesActions.
- UI and JQuery HTTP implementation.
Let’s dive into it.
1. Upload Custom CSS for the CAPTCHA UI
Upload the following CSS and image files into your Web Files section:
- captcha.css
- captchatile.jpg
- update64.png
2. Use Marius Wodtke’s PowerPagesActions solution
Install Marius Wodtke’s Power Pages Actions solution from Github. For more details, please look at my Recaptcha article for instructions.
3. Create 2 Plugins
Create 2 plugins:
- GenerateCaptcha – used to generate the CAPTCHA code for the UI.
- ValidateCaptcha – used to perform the server-side validation.
GenerateCaptcha
The reason I generated the CAPTCHA code in the server-side was for security purpose. The original CAPTCHA control generated the code on the client side using Javascript. I felt this was not too secure. The plugin returned 2 variables:
- CaptchaCode
- CaptchaCodeHash
My code looked like below:
                const string chars = "ABCDEFGHIJKLMNOPQRSTUVWXYZabcdefghijklmnopqrstuvwxyz0123456789";
                StringBuilder sb = new StringBuilder();
                Random random = new Random();

                for (int i = 0; i < Global.Constants.CAPTCHA_LENGTH; i++)
                {
                    sb.Append(chars[random.Next(chars.Length)]);
                }

                var captchaCode = sb.ToString();
                byte[] textBytes = Encoding.UTF8.GetBytes(captchaCode);
                var captchaCode64 = Convert.ToBase64String(textBytes);

                context.OutputParameters["CaptchaCode"] = captchaCode64;
                context.OutputParameters["CaptchaCodeHash"] = Global.Functions.HashStringSHA256(captchaCode);
I first generated the random string of 6 characters. Then, I generated a Base64String out of it before passing it to the CaptchaCode output parameter.
Secondly, I also generated a hash (in my case, I used SHA256) of the generated code. This will be used later on for server-side validation. I passed this hash code to the CaptchaCodeHash output parameter.
ValidateCaptcha
For this plugin, it accepts the following input parameters:
- CaptchaInput – this is the code user entered from the UI
- CaptchaHash – this is the hash generated by GenerateCaptcha plugin that is passed to the UI, then passed back as an input parameter
And the output parameter:
- CaptchaResponse
My code looks like the following:
                string input = (string)context.InputParameters["CaptchaInput"];
                string captchaHash = (string)context.InputParameters["CaptchaHash"];

                tracingService.Trace(input);

                if (!string.IsNullOrEmpty(input) && secretKey != null && !String.IsNullOrEmpty(captchaHash) &&
                    !String.IsNullOrEmpty(contentSnippetName))
                {
                    var hashedCaptchaInput = Global.Functions.HashStringSHA256(input);

                    if(hashedCaptchaInput == captchaHash)
                    {
                        context.OutputParameters["CaptchaResponse"] = "success";

                    }

                }
As you can see above, I compare the hashed CaptchaInput with the CaptchaHash to perform the server validation.
4. Create 2 Custom APIs to call the plugins
Apologies for not repeating myself, but please refer to my Recaptcha article to create custom APIs for the 2 plugins we created earlier.
5. Add Table Permission and Site Settings
Similarly, please refer to my Recaptcha article for more information on the required Table Permission and Site Settings.
6. Register your Custom API with PowerPagesActions
Same with this one, you will need to create 2 Custom APIs for the plugins we created earlier. Please refer to my Recaptcha article.
7. UI and JQuery HTTP implementation
Finally, let’s implement the CAPTCHA on our Power Pages page. On my page, the CAPTCHA is displayed upon clicking of a link on the page with ID=”btnShowContact”. The CAPTCHA is displayed inside a modal window, hence why you would see jquery-ui being used below.
The flow of the code is as follows:
- Initialise the modal window for the CAPTCHA
- Load the CAPTCHA (see LoadCustomCaptcha() method below). This is calling our GenerateCaptcha plugin. Store the resulting CaptchaHash response to a local JS variable.
- Bind btnReloadCaptcha to LoadCustomCaptcha() method so that user can generate a new CAPTCHA as necessary.
- Bind btnSubmitCaptcha to the SubmitCaptcha() method to perform the CAPTCHA validation. In SubmitCaptcha() it will call our ValidateCaptcha plugin. We assign CaptchaInput input parameter with the user textbox input #UserCaptchaCode, and also CaptchaHash to the captchaHash local variable we assigned earlier with the hash coming from GenerateCaptcha plugin.
My code is as follows:
<a href="" class="default" id="btnShowContact" style="text-decoration: none;">Click to Show Captcha</a>


<div id="dialog" title="Captcha Validation">
  <span id="spanPleaseWaitCaptcha">Please wait...</span>
  <div id="recaptcha-container"></div>


  <section>
    <fieldset>
      <span id="SuccessMessage" class="success">Hurray! Your have successfully entered the captcha.</span>
      <input type="text" id="UserCaptchaCode" class="CaptchaTxtField" placeholder='Enter Captcha - Case Sensitive'>
      <span id="WrongCaptchaError" class="error"></span>
      <div class='CaptchaWrap'>
        <div id="CaptchaImageCode" class="CaptchaTxtField">
          <canvas id="CapCode" class="capcode" width="300" height="80"></canvas>
        </div>
        <input type="button" class="ReloadBtn" id="btnReloadCaptcha" />
      </div>
      <input type="button" class="btnSubmit" id="btnSubmitCaptcha" value="Submit">
    </fieldset>
  </section>
</div>

<div id="dialogPleaseWait" title="Please Wait">
  Please wait while we fetch your data...
</div>

<div id="dialogContent" title="Contact Information">
</div>

<script src="/jquery-ui.js"></script>
<link rel="stylesheet" href="/jquery-ui.css">
<link rel="stylesheet" href="/captcha.css">

<script>
    var captchaCode = "";
    var captchaHash = "";

    $(document).ready(function(){
      var w = $(window).width() - 200;
      var h = $(window).height() - 100;

      $( "#dialog" ).dialog({
          autoOpen: false,
          modal: true, // Optional: Makes the dialog modal, blocking interaction with the background,
          width: 450,
          height: 350,
          closeText: "X"
      });

      $( "#dialogContent" ).dialog({
          autoOpen: false,
          modal: true, // Optional: Makes the dialog modal, blocking interaction with the background,
          width: w,
          closeText: "X"
      });

      $( "#dialogPleaseWait" ).dialog({
          autoOpen: false,
          modal: true, // Optional: Makes the dialog modal, blocking interaction with the background,
          width: 400,
          height: 400,
          closeText: "X"
      });

      $('#btnShowContact').click(function(e){
        $("#dialog").dialog("open");

        e.preventDefault();
      });

      LoadCustomCaptcha();

      $('#btnReloadCaptcha').click(function(e){
        //location.reload();
        LoadCustomCaptcha();

        e.preventDefault();
      });

      $('#btnSubmitCaptcha').click(function(e){
        SubmitCaptcha();

        e.preventDefault();
      });
    });

    function SubmitCaptcha()
    {
      $("#dialog").dialog("close");
      $('#dialogPleaseWait').dialog("open");

      shell.getTokenDeferred().done(function (s) {
          var actionInputs = JSON.stringify({
              "CaptchaInput" : $('#UserCaptchaCode').val(),
              'CaptchaHash' : captchaHash
          });

          $.ajax({
          url: "/_api/mwo_powerpagesactions?$filter=mwo_operation eq 'ValidateCaptcha' and mwo_inputs eq '" + actionInputs + "'",
          type: 'GET', // Specifies the HTTP method as POST
          headers: {
              'Content-Type': 'application/json',
              '__RequestVerificationToken': s,
              'Authorization': 'Bearer ' + s
          },
          success: function(response) {
              $('#dialogPleaseWait').dialog("close");
              LoadCustomCaptcha();

              if(response != null && response.value != null && response.value.length > 0)
              {
                var responseValue = response.value[0];

                if(responseValue.mwo_outputs != null && responseValue.mwo_outputs != "" && responseValue.mwo_outputs != "undefined")
                {
                  var responseValueObj = JSON.parse(responseValue.mwo_outputs);

                  if(responseValueObj != null && responseValueObj.CaptchaResponse != null && responseValueObj.CaptchaResponse == "success")
                  {
                    // CAPTCHA validation is successful.


                  }
                }
              }

          },
          error: function(xhr, status, error) {
              $('#dialogPleaseWait').dialog("close");
              LoadCustomCaptcha();

              console.error('Error:', error);
          }
          });

      });


    }

    function createRandomString(length) {
      const characters = "ABCDEFGHIJKLMNOPQRSTUVWXYZabcdefghijklmnopqrstuvwxyz0123456789";
      let result = "";
      for (let i = 0; i < length; i++) {
        result += characters.charAt(Math.floor(Math.random() * characters.length));
      }
      return result;
    }

    function LoadCustomCaptcha()
    {
      shell.getTokenDeferred().done(function (s) {
          var actionInputs = JSON.stringify({
              "Random" : createRandomString(10),
          });

        $.ajax({
              url: "/_api/mwo_powerpagesactions?$filter=mwo_operation eq 'GenerateCaptcha' and mwo_inputs eq '" + actionInputs + "'",
              type: 'GET', // Specifies the HTTP method as POST
              headers: {
                  'Content-Type': 'application/json',
                  '__RequestVerificationToken': s,
                  'Authorization': 'Bearer ' + s
              },
              success: function(response) {

                $('#dialogPleaseWait').dialog("close");

                if(response != null && response.value != null && response.value.length > 0)
                {
                  var responseValue = response.value[0];

                  if(responseValue.mwo_outputs != null && responseValue.mwo_outputs != "" && responseValue.mwo_outputs != "undefined")
                  {
                    var responseValueObj = JSON.parse(responseValue.mwo_outputs);

                    if(responseValueObj != null)
                    {
                      console.log(responseValueObj);
                      captchaCode = responseValueObj.CaptchaCode;
                      captchaHash = responseValueObj.CaptchaCodeHash;

                      var cd = atob(captchaCode);
                      console.log(cd);

                      $('#CaptchaImageCode').empty().append('<canvas id="CapCode" class="capcode" width="300" height="80"></canvas>');

                      var c = document.getElementById("CapCode"),
                          ctx=c.getContext("2d"),
                          x = c.width / 2,
                          img = new Image();

                      img.src = "/captchatile.jpg";
                      img.onload = function () {
                          var pattern = ctx.createPattern(img, "repeat");
                          ctx.fillStyle = pattern;
                          ctx.fillRect(0, 0, c.width, c.height);
                          ctx.font="46px Roboto Slab";
                          ctx.fillStyle = '#ccc';
                          ctx.textAlign = 'center';
                          ctx.setTransform (1, -0.12, 0, 1, 0, 15);
                          ctx.fillText(cd,x,55);
                      };

                      $('#spanPleaseWaitCaptcha').hide();

                    }
                  }
                }
              }
        });
      });
    }
Conclusion
I hope this article is useful. Thanks for your time reading, and any questions just let me know. Cheers.
